SAP Commerce Cloud
Introduction
Our SAP Commerce Cloud plug-in comes with regular updates and full integration support, offering a versatile out-of-the-box solution to accept online payments easily:
- Supports both Hosted Checkout Page and Hosted Tokenization Page integration methods.
- Manages multiple stores.
- Accepts payment operations (Refunds, authorisations, captures etc.) directly from your SAP Commerce Cloud Backoffice.
Find the complete list of payment methods the plugin supports in our payment methods overview.
Keep an eye on our Release Notes to stay informed about updates and new features (i.e. payment methods, features, integration methods) we have added to this plugin!
Check out our documentation to learn how to link your store with our platform to profit from all these features!
Download plugin Download from GitHub- Entrust a system administrator with the installation and configuration of the plugin. Accordingly, the target audience of this documentation is system administrators with a profound knowledge of SAP Commerce Cloud / Hybris.
Account Creation
To process transactions with this plugin, you need an account on our platform.
This plugin works with both our test and live environments. A test account is a great way to get familiar with both the plugin and our platform. Once you want to go live, contact us!
Plugin code modifications void technical support
For security and stability, ANZ Worldline Payment Solutions does not support plugins whose code has been modified by the merchant or a third party. Plugins are provided as-is (official version). Any unauthorised modification voids support and warranty and may cause malfunctions, security gaps, or incompatibilities with PSP updates.
Installation
Install plugin
The first step to use the plugin is the installation process. Before you proceed, make sure your infrastructure meets these system requirements:
| Item | Description |
|---|---|
| Plugin package | |
| ANZ Worldline Payment Solutions credentials |
|
| Java |
At least version 17, SapMachine 17 is recommended JAVA_HOME property will need to be set to the correct location for the installer to work correctly |
| SAP Commerce |
Officially supported versions of SAP Commerce cloud are:
Other patch releases of 2211 are compatible with this plugin. However, the plugin is untested for other versions. You will need to source a copy of SAP Commerce, as it is not included with the plugin. |
| SAP Commerce components |
The reference storefront implementation is designed to work with both B2C and B2B accelerators. If you have already customised your system heavily, some additional integration may be required, as this plugin is designed to work with the standard Accelerator UI. |
| Development environment |
The examples in this document work with a UNIX-based development environment (e.g. Mac OS X or Linux). For Windows installations, use the appropriate Windows commands (e.g. setantenv.bat, hybrisserver.bat). |
| PCI compliancy |
SAQ A |
On top of these prerequisites, make sure to respect the extension structure:
| Property | Description |
|---|---|
| worldlinedirectb2ccheckoutaddon | Contains the storefront modifications required to facilitate the injection of the Worldline Online Payments Direct payment journeys into the B2C Storefront Checkout Journey. |
| worldlinedirectbackoffice | Contains Backoffice modifications to facilitate configuration of the plugin. |
| worldlinedirectb2bcheckoutaddon | Contains the storefront modifications required to facilitate the injection of the ANZ Worldline Payment Solutions payment journeys into the B2B Storefront Checkout Journey. |
| worldlinedirectcore | Contains any data model additions and functional services which use our REST API. Also includes the Java SDK. |
| worldlinedirectcustomersupportbackoffice | Contains modifications to the Customer Support Backoffice perspective, which allow a Customer Support agent to manually capture or refund a transaction. |
| worldlinedirectocc | Contains enhancements to the Omni Commerce Connect REST APIs included with SAP Commerce: You can process payments from a headless storefront or mobile app. |
| worldlinedirectwebhook | Contains an endpoint for transaction status updates from our platform via webhooks. |
This installation process applies to either:
- a brand-new project with a standard.
- out of the box accelerator storefront.
- an existing project with its own storefront extension based on yacceleratorstorefront.
Once done, follow these steps:
1. Install SAP Commerce using ‘cx’ Recipe
SAP provides instructions for using the installation recipes in the SAP Help Portal. If you are unfamiliar with the general installation process, make sure to read through this before the installation.
You will require an existing installation of SAP Commerce to use the plugin. If you already have an installation of SAP Commerce with the B2C Accelerator and its corresponding extensions included, skip this step.
- Download SAP Commerce in .Zip format. Unzip the platform and navigate to the ‘installer’ directory.
- Run the following command: Replace ‘your_password’ with your desired administrator password for the system.
./install.sh -r cx -A local_property:initialpassword.admin=your_password- Run the following to build and initialise the system:
./install.sh -r cx initialize -A local_property:initialpassword.admin=your_password- Add Extensions to Codebase
Download and unzip the file
Confirm you have received the following directory structure
hybris/
           config/
           bin/
                       custom/
worldline/- The config directory contains a sample set of configurations in the local.properties file. Copy these configurations into the local.properties file generated after the SAP Commerce installation.
- The config directory also contains a localextensions.xml file. Add the following from this file to your own localextensions.xml file that was generated after the SAP Commerce installation:
<!-- WORLDLINE -->
<extension dir="${HYBRIS_BIN_DIR}/custom/worldline/worldlinedirectcore"/>
<extension dir="${HYBRIS_BIN_DIR}/custom/worldline/worldlinedirectb2ccheckoutaddon"/>
<extension dir="${HYBRIS_BIN_DIR}/custom/worldline/worldlinedirectb2bcheckoutaddon"/>
<extension dir="${HYBRIS_BIN_DIR}/custom/worldline/worldlinedirectbackoffice"/>
<extension dir="${HYBRIS_BIN_DIR}/custom/worldline/worldlinedirectocc"/>
<extension dir="${HYBRIS_BIN_DIR}/custom/worldline/worldlinedirectwebhook"/>
You should examine each extension’s extensioninfo.xml file (contained within the root of each extension’s directory) to ensure the extensions mentioned within each <requires-extension> tag are included in your localextensions.xml.
- The bin/custom/worldline directory contains all required extensions. Copy them into your own hybris/bin/custom/worldline directory. If you wish to put these extensions in a different directory, update your localextensions.xml accordingly.
2. Install Extension to Storefront
- To run the ant commands below, you will need to run . ./setantenv.sh or its Windows equivalent within the hybris/bin/platform directory.
- You may need to run the following command to ensure the correct addons are available in your storefront:
ant addoninstall
-Daddonnames="adaptivesearchsamplesaddon,assistedservicecustomerinterestsaddon,assist
edservicepromotionaddon,assistedservicestorefront,assistedserviceyprofileaddon,captch
aaddon,configurablebundleaddon,consignmenttrackingaddon,customercouponaddon,customerc
ouponsamplesaddon,customerinterestsaddon,customerticketingaddon,eventtrackingwsaddon,
merchandisingaddon,merchandisingstorefrontsampledataaddon,multicountrysampledataaddon
,notificationaddon,ordermanagementaddon,orderselfserviceaddon,pcmbackofficesamplesadd
on,personalizationaddon,personalizationsampledataaddon,personalizationyprofilesampled
ataaddon,profiletagaddon,selectivecartsplitlistaddon,smarteditaddon,stocknotification
addon,textfieldconfiguratortemplateaddon,timedaccesspromotionengineaddon,timedaccessp
romotionenginesamplesaddon,xyformssamples,xyformsstorefrontcommons,ysapproductconfiga
ddon" -DaddonStorefront.yacceleratorstorefront=""
Replace <YOUR-STOREFRONT> with your storefront extension’s name, e.g. yacceleratorstorefront or <project>storefront
- Install the Addon to your Storefront, use the following command:
ant addoninstall -Daddonnames="worldlinedirectb2ccheckoutaddon"
-DaddonStorefront.yacceleratorstorefront="<YOUR-STOREFRONT>"- Use the following command to install the B2B addon to your storefront:
ant addoninstall -Daddonnames="worldlinedirectb2bcheckoutaddon"
-DaddonStorefront.yacceleratorstorefront="<YOUR-STOREFRONT>" - Now rebuild your system:
ant clean all- Perform either an initialisation or system update. You can do both via the Hybris Administration Console (HAC) at https://<your-server>:9002/hac or you can initialize this via the ant target:
ant initialize
Configuration
After the installation, you need to configure the plugin to link your store to our platform. This section of the documentation will cover technical configuration elements only.
Also, please note that the ANZ Worldline Payment Solutions API has a 50-character limit for the customer email address field, while the SAP Commerce Cloud platform and the plugin do not. So do not forget to validate this field to conform to this limit.
Configure properties
- From worldlinedirectcore/project.properties :
worldline.direct.api.authorizationType=V1HMAC
worldline.direct.api.connectTimeout=10000
worldline.direct.api.socketTimeout=10000
worldline.direct.api.maxConnections=10
worldline.direct.api.integrator=Worldline
The Java SDK passes these configurations and controls the connectivity. Have a look at our dedicated Java SDK documentation for more information.
- From worldlinedirectbackoffice/project.properties:
worldline.contact.support.default.cc=
worldline.contact.support.default.bcc=
worldline.contact.support.default.subject=default subject
These configurations control the button within the SAP Back Office, which is used to contact us for support via email.
Configure Webhooks
The plugin uses webhooks to get the current status of your transactions from our platform. SAP Commerce uses the endpoint /worldline/webhook to receive these status updates.
Configure a WebhooksKey, WebhooksKeySecret and Endpoint URLs in your PSPID as described in our dedicated guide. Make sure the URL:
- Contains your site’s hostname '(i.e. https://<your-domain>:9002/worldline/webhook)'
- Has a valid SSL certificate
Configure SAP Backoffice
The following steps cover the configuration process of the SAP Commerce Backoffice. For general information about the SAP Commerce Backoffice, refer to the Business User guides in the SAP Help Portal.
After the successful installation, the SAP Backoffice contains a new item type “Worldline Configuration”. Follow these steps to link your Base Store in SAP Commerce to our platform:
- Login to the SAP Commerce Backoffice via the default URL https://<hostname>:9002/backoffice. Default administrator credentials will have been defined during installation or provided to you separately.
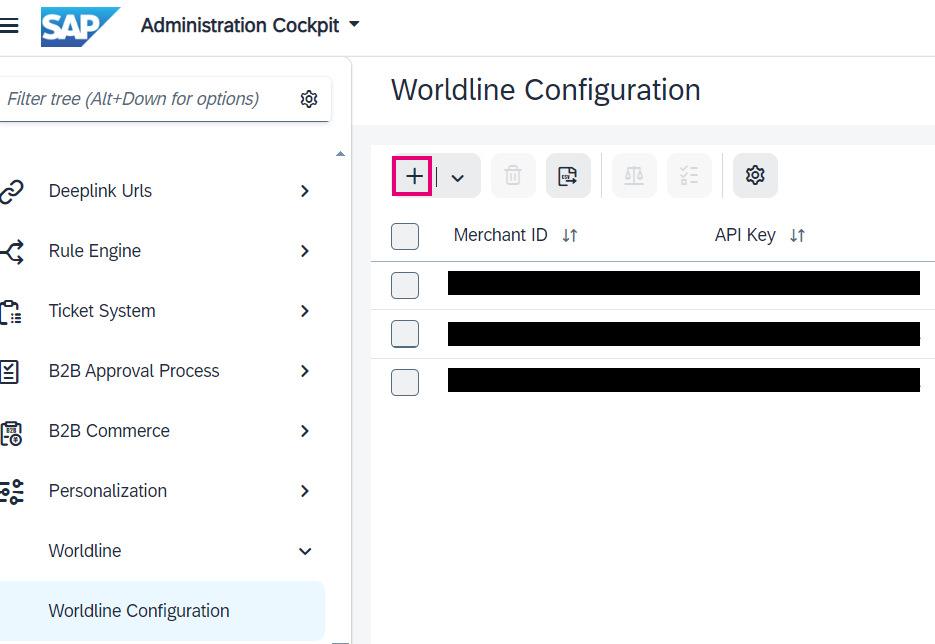
Go to Worldline > Worldline Configuration. Click on the “+” – symbol in the taskbar.
- Enter the following from the table in the appearing pop-window:
| Property | Description/Actions |
|---|---|
| API Key | Enter the API key of your test or live PSPID. Read our dedicated guide to learn how to generate one. |
| API Secret | Enter the API secret of your test or live PSPID. Read our dedicated guide to learn how to generate one. |
| Apply Surcharge |
Confirm choices on whether you want to apply surcharge to your transactions. |
| Ask Consumer Consent | Configure this in the following step. |
| Endpoint URL |
The test or live endpoint on our platform. Copy them from our dedicated guide.
|
| First recurring payment |
Indicate whether to fully charge your customers for the first order in a series of multiple orders. |
| Grouped cards |
Define whether to group all card payment methods on the Hosted Checkout Page. |
| Split order level promotion to line items |
This functionality is still available inside the plugin, but it is no longer required. The ANZ Worldline Payment Solutions API has been updated to include order-level discounts, so you can safely disable this feature. |
| Merchant ID | Enter the PSPID on our platform that you want to use for transaction processing. |
| webhookKeyId | Enter the webhookKeyId of your test or live PSPID from the previous step. |
| webhookSecret | Enter the webhookSecret of your test or live PSPID from the previous step. |
Click on "Finish" to confirm your configuration.
Select a config from the list of existing configurations to modify it. Open it, and the editor will appear at the bottom of the screen. Please remember to save the updated configurations.
Test Connection
Once you complete these steps, verify the configuration by establishing a test connection between the plugin and our platform:
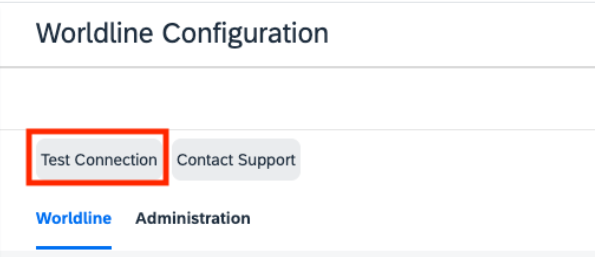
Merchants can now share feedback or request additional features via the “Request a new feature” button inside the plugin.
Click on the configuration profile in the table you have just confirmed. Enter the following from the table overview:
Worldline Tab
| Property | Description/Actions |
|---|---|
| Operation configuration |
If "Operation Code" is set to "Authorization", beware of the following:
|
| Tokenization configuration |
|
| Grouped cards configuration |
|
| Recurring payments configuration |
|
| Payment method sorting | Configure the order in which payment methods are displayed on the checkout page. |
| Intersolve configuration | Configure the Session Timeout for Intersolve payments. |
3-D Secure Configuration (3DS tab)
| Property | Description/Actions |
|---|---|
| Enable 3DS |
Enable or disable 3-D Secure. We strongly recommend selecting "Yes" as 3-D Secure is mandatory in some markets. This will also ensure liability shifts for transactions with successful 3-D Secure authentication. If you select "No", you may not benefit from liability shifts and may be held liable. |
| Enable mandatory 3DS |
Define whether to enforce Strong Customer Authentication (SCA) regardless of any possible exemptions. |
| Exemption type |
Define the type of exemption you want to offer. The available options are No challenge request (Default), Low-value, and Transaction-risk-analysis. |
| Exemption limit (No challenge request) |
Request the issuer to skip 3-D Secure for baskets up to 100 EUR. |
| Exemption limit (Low-value) |
Request exemptions for baskets up to 30 EUR. |
| Exemption limit (Transaction-risk-analysis) |
Request exemptions based on a risk analysis performed by the acquirer or the issuer, for baskets up to 100 EUR. |
Click on “SAVE” to confirm your configuration.
Configure Base store
Before you start processing (test) transactions, you need to
- Link your Base stores with the plugin configuration.
- Select an integration method.
To do so, follow these steps and confirm by clicking "SAVE" in each tab:
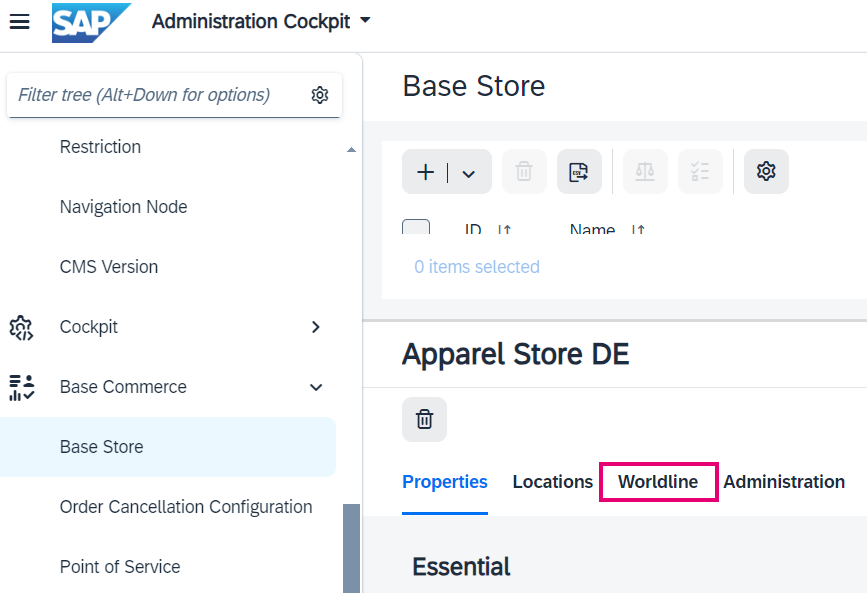
- Go to Base Commerce > Base Store. Select the store from the table with headers "ID" / "Name".
Select "Worldline" from the available tabs and scroll down to "WORLDLINE CONFIGURATION".
- Enter the following from the table overview:
| Property | Description/Actions |
|---|---|
| Payment Provider Configuration |
Associates your base store with a configuration profile. Click on the field to select the configuration profile you set up in the previous steps. |
| Checkout type |
Select an integration method for transaction processing. You can choose from the following options:
Do not switch between checkout modes whilst the site is live, as this might lead to undesirable effects on your customers' payment journey. |
| Merchant Email |
Define the sender e-mail address your customers will receive updates from about updates for their replenishment orders. |
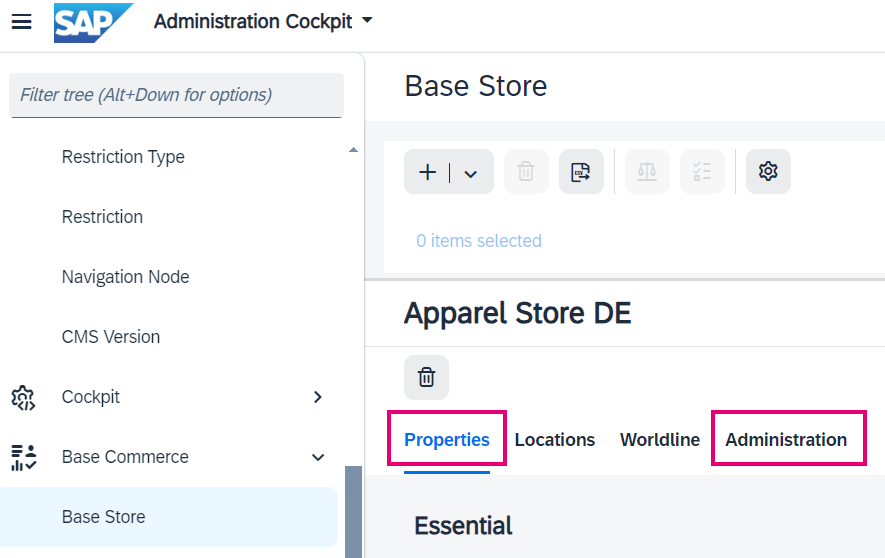
- Select "ADMINISTRATION" from the available tabs and scroll down to "UNBOUND". Enter "worldlineB2CResponsiveCheckoutGroup" in the field "Checkout Flow Group"
- Select "PROPERTIES" from the available tabs and scroll down to "PAYMENT PROVIDER". Enter "Worldline" in the field "Payment Provider"
Configure Payment Modes
To configure this list of Payment Modes in SAP Commerce, navigate to the following menu in Backoffice:
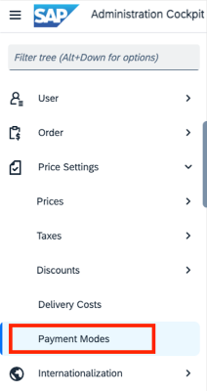
Once you click on Payment Modes, you will see a list of Payment Modes currently loaded in the system. After selecting a Payment Mode, you can enable or disable it by changing the isActive flag.
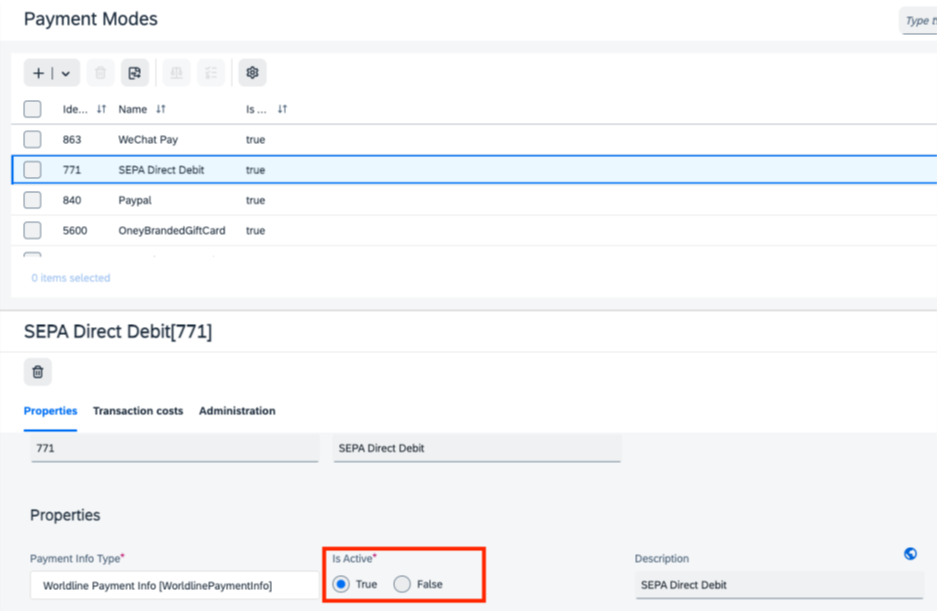
If you add a new Payment Mode to your account in the ANZ Worldline Payment Solutions Backoffice, you may need to manually add it to the system by clicking the '+' button at the top of the Payment Modes List.
Configure Card On File
To configure Card On File, go to Worldline > Worldline Recurring Token.
This list shows all available tokens for Card On File in your system. Click in the respective line in the table to get a comprehensive overview about the individual token and possible actions:
| Property | Description |
|---|---|
| Token | Unique identifier of the token on our platform. Returned by our platform when creating the token with the first order. |
| Alias | Masked card number linked to this token. |
| Cardholder name | Name of the cardholder linked to this token. |
| Expiry date | Expiry date of the card linked to this token. |
| Subscription ID | Unique identifier of the replenishment order and of the cronjob generating all subsequent orders. |
| Status |
The token's status. Possible values:
|
| Customer |
Unique identifier of your customer who placed the initial order when creating the token. Refer to the Administration tab for more information. |
| Store |
Unique identifier of the store ID managing the replenishment. Refer to the Administration tab for more information. |
Replenishment Orders
Both B2B and B2C storefronts have access to the replenishment order feature. There are several configurations you need to set to customise it, which we have explained in the previous sections.
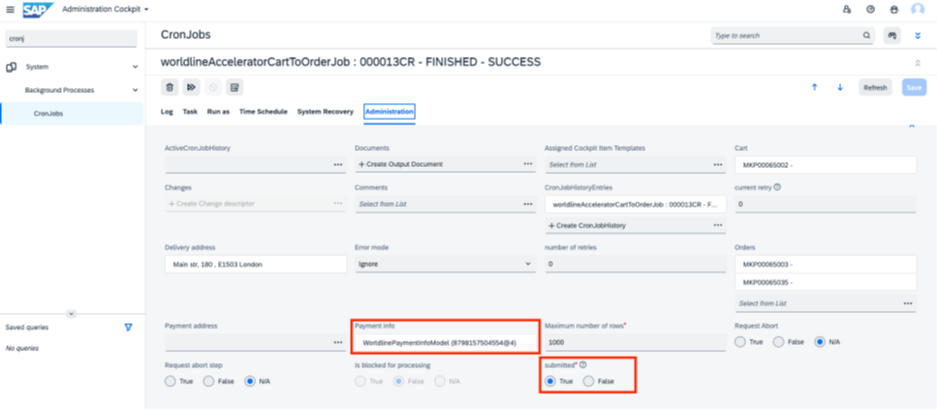
Replenishment orders are created using a cronjob. You need the following properties for replenishment order processes:
- Cart – This is the blueprint of the replenishment order.
- Orders – List of orders placed using the Cart data. The first placed order is the one that the customer places manually during the checkout process. All subsequent orders are created from the cronjob.
- CronJobHistoryEntries – Keeps information about cronjob executions.
- Payment Info – The payment info used for server-to-server calls to ANZ Worldline Payment Solutions used to process payments for subsequent orders.
- Submitted – This property is used to indicate there were no issues during cronjob creation. If it is set to false, no future orders will be created.
You can find all detailed configurations and processes in the README guide shipped with the plugin package.
Manage payments
We have designed the plugin to follow up on your orders automatically and autonomously, freeing you from the administration involved. Learn here how to use our plugin effectively, which could help your business to thrive!
Perform maintenance operations
Captures, refunds and cancellations of authorisations are standard processes (also known as maintenance operations) in your everyday business logic. You can perform these operations on a transaction using the Customer Support Backoffice.
Once you log in to the Customer Support Backoffice, all orders will be listed in the Orders section. You can select the order you want to perform maintenance operations on.
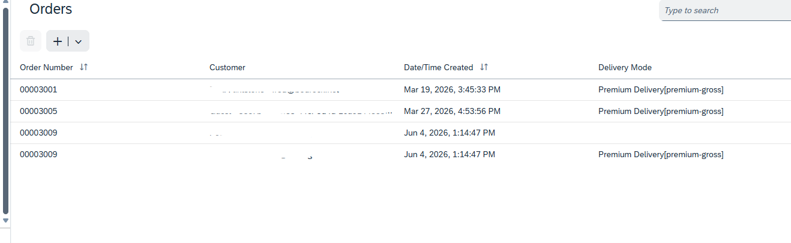
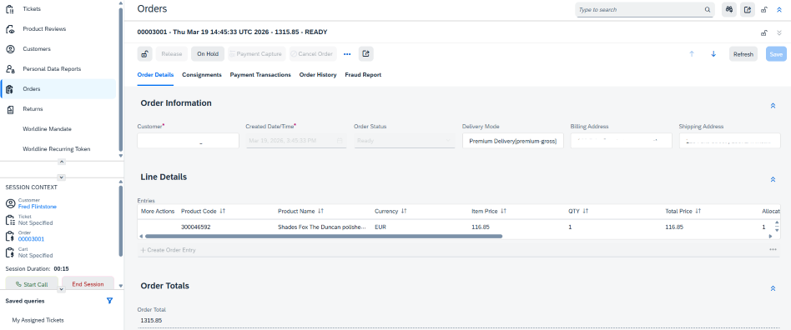
You can perform actions like capturing or cancelling payments from the options available at the top of the order details section. Cancelling an order will trigger a refund request or authorisation cancellation where applicable.
Managing recurring tokens
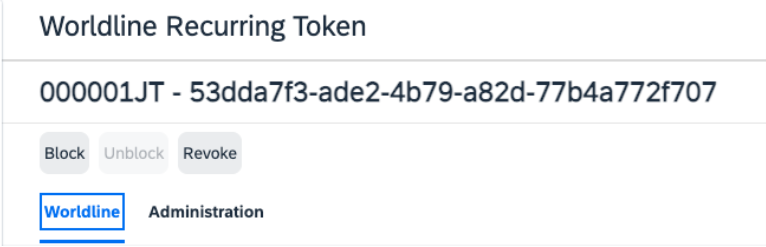
Maintenance operations also allow you to manage recurring tokens. You may Block, Unblock, or Revoke them.
Managing mandates
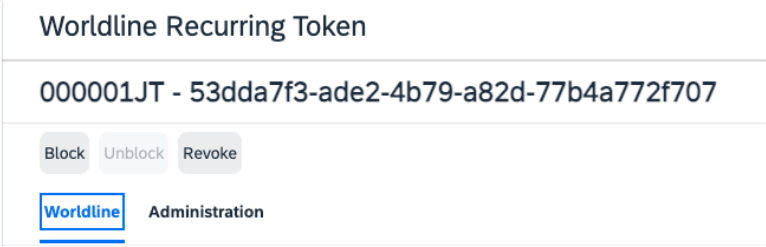
You can manage the status of mandates through the following actions: Block, Unblock or Revoke.
Perform test transactions
Use our platform's test environment to make sure your plugin works as intended. We offer test data sets on our dedicated Test cases page. Target our test environment as described in the "Configure Plugin" section.
Make sure to switch to the LIVE environment as soon as you have finalised your tests.