Google Pay
Intro
Google Pay™ is a digital wallet for online payments offered by Google.
It is a very versatile solution, as customers can add credit/debit cards to their wallet and use them for:
- Android devices in-store and supported websites
- Mobile apps
- Google services
By combining the Google API with our CreatePayment API, the payment process is fast, easy and secure. Boost your conversion rate with these features:
- Your customers simply tap on a device in stores or on a button in a mobile app.
- Google Pay™ and we manage all sensitive customer data for you.
- A safe encryption/decryption method elevates your customers' trust in the whole payment process and significantly reduces online fraud: neither are customer details sent during the payment process nor show Browsers/devices ever unmasked card numbers.
To make all this possible, Google Pay™ tokenises your customers' cards. Google Pay™ identifies two types of cards:
- Non-network tokenised cards: standard physical credits card that require a 3-D Secure check for additional protection against fraud. This is only applicable for payments going through your own checkout page.
- Network tokenised cards: virtual card with a device-specific account number (DPAN). These kind of cards are used in place of the underlying source card. As the digital signature of the mobile device used for the payment protects these cards from fradulent use, 3-D Secure is unnecessary. This is only applicable for customers using a mobile device.
Your customers can use cards from the following brands:
- Google Pay - Visa
- Google Pay - MasterCard
- Google Pay - American Express
Key benefits
- No personal data shared
- Low PCI requirements (no sensitive or personal data shared)
- Allows any standard maintenance operation depending on your acquirer
- Available through Full Service
Onboarding
Please make sure
- To get a test account on our platform
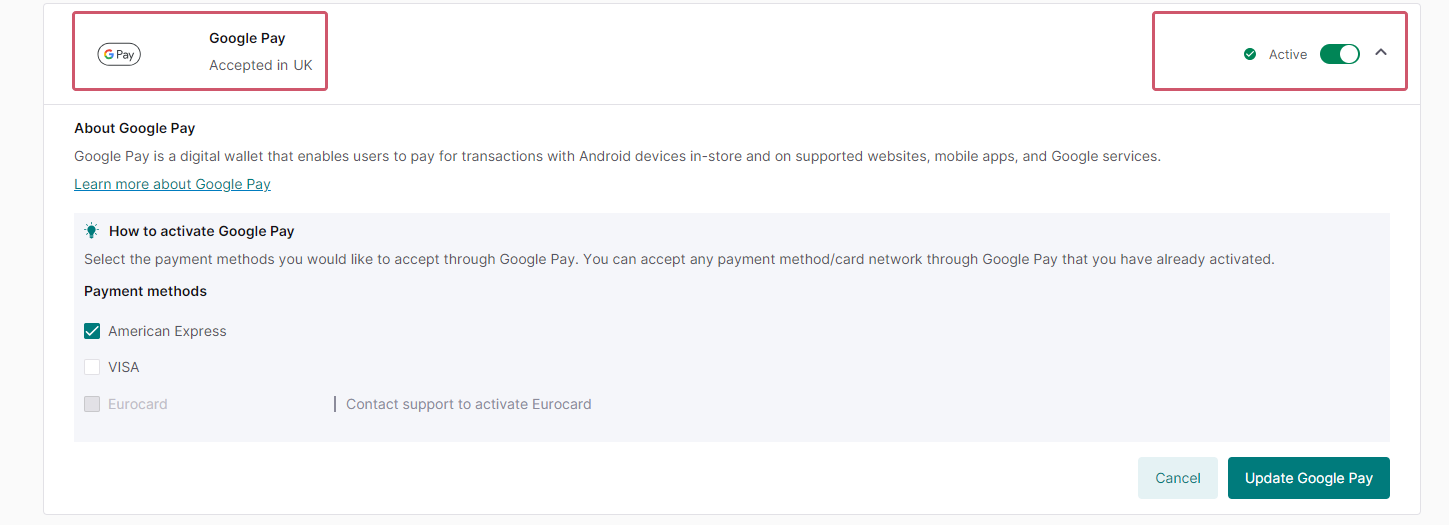
- That this payment method is active in your account. Check this in the Merchant Portal via Business > Payment methods.
- Comply with the Terms of Service of Google and to adhere to Google Pay API Acceptable Use Policy
- To meet the Google Pay™ API requirements (check the Setup section of the Google documentation and the guidelines for acceptable use)
- To get a Google account and integrate Google Pay™ either in your webshop payment page according to this checklist / or via Android according to this checklist
- Create successful test transactions, as this is Google’s requirement to get production access to their platform and their approval to use this payment method on your checkout page/in your app. Learn more on Google’s "Request production access" and "Deploy production environment" section
Use the information available in our Integration and the Testing chapter to get this done
Countries & currencies
Supported countries
-
 Albania
-
 Algeria
-
 American Samoa
-
 Angola
-
 Antigua and Barbuda
-
 Argentina
-
 Australia
-
 Austria
-
 Azerbaijan
-
 Bahrain
-
 Belarus
-
 Belgium
Supported currencies
- Albanian lek (ALL)
- Algerian dinar (DZD)
- Angolan kwanza (AOA)
- Argentine peso (ARS)
- Armenian dram (AMD)
- Aruban florin (AWG)
- Australian dollar (AUD)
- Azerbaijani manat (AZN)
- Bahamian dollar (BSD)
- Bahraini dinar (BHD)
- Bangladeshi taka (BDT)
- Barbados dollar (BBD)
Integration
With Google Pay™, your customers can purchase goods/services with a credit or debit card stored in their Google account. Whether they are shopping from their Android devices or in the internet, the payment process is much simpler: Google Pay™ displays a payment sheet that selects the preferred card payment method that the buyers confirm.
Check out the video to how buyers pay with Google Pay™.
To receive a liability shift when using Google Pay™, you must authenticate the transaction with 3-D Secure.
Our platform offers you two types of integration for your business:
Find a high level overview in the "Process flows" chapter.
- When using the Google API, make sure to consult the Web / Android / Web Google Pay™ Brand Guidelines. They tell you about the Google Pay™ do’s and don’ts, show the types of supported buttons and best practices to max out your conversion rate.
- To use this payment method, your customers need to install the Google Pay™ app on their device.
- If you want to offer Google Pay™ on your own checkout page, make sure both Visa and Mastercard are active in your account. Check this in your account. If they are not active yet, contact us.
- This integration method requires your customers with a desktop/tablet device to pay with regular credit cards. In such a scenario, 3-D Secure is mandatory. Learn here how to implement 3-D Secure in the transaction flow.
Google Pay™ on your own Checkout page
Use our JavaScript SDK to implement Google Pay™ with the Google Pay™ button directly into your own checkout page. In this case, you need to open a Google Pay™ sheet and get the payment token that Google will encrypt for you with our public key.
When you have received the payment token, you have to send it to us using our Create Payment API call though the Server API to complete the payment. After this step, we will handle the decryption for you.
To do so, you need to:
- Open a Google Pay™ sheet.
- Get the payment token that Google encrypts for you with our public key with the Google API.
- Send the payment token using our CreatePayment API with one of our Server SDKs so we can handle the decryption for you.
This integration method gives you the following benefits:
- Better visibility of the Google Pay™ button on your website for higher conversion.
- You can use the Google Pay™ API to retrieve your customer’s personal details as their address or email.
Once you have followed Google’s setup guidelines, you are ready for the technical integration. Google offers a very clear and concise tutorial on how to implement Google Pay™ on your Website. The technical integration includes the following steps:
- Retrieve GooglePay™
- Prepare request data
- Comply with Strong Customer Authentication (SCA)
- Render Google Pay™ button
- Initialise the Payment
- Get the payment token
- Send the payment token
- Because you use us to decrypt sensitive payment information, Google uses the following type of tokenization: PAYMENT_GATEWAY. We will explain the how-to in the following steps.
- Depending on the device used for the payment, two scenarios are possible:
- 1. Mobile devices: Your customers use a network-tokenised card for the payment. These virtual cards are linked to a device-specific account number (DPAN). A digital signature protects these card from fraudulent use, making 3-D Secure unnecessary.
- 2. Desktop/Tablet devices: Your customers use a non-network tokenised card for the payment. These are standard physcial credit cards that require a 3-D Secure check. Step
“Send payment token” explains in detail what you have to do in either case.
1. Retrieve Google Pay™
Use the JavaScript Client SDK to retrieve the Google Pay™ payment product via the payment product(s) API call. This will provide you with the data needed for the next steps, such as the supported networks.
Use the following code sample to make the call:
// session is an instance of the Session object, the SDK's main entry point. Note that the session has to be initialized before using it.const googlePayProduct = await session.getPaymentProduct(320, paymentDetails).catch(() => null);if (!googlePayProduct) {// Google Pay™ is not available, offer your customer another payment option to complete the payment}// Google Pay™ is available, show the Google Pay™ button
2. Prepare request data
You must specify the credit card network allowed for the current Google Pay™ transaction. The GetPaymentProduct call (both via client-to-server and server-to-server) returns the available networks. The networks are available in the response paymentProduct320SpecificData field. The Google Pay™ API directly accepts the return values.
Since we decrypt the Google Pay™ment token for you, you need to set a specific value for the gateway field in the tokenization request. This value is also available in the paymentProduct320SpecificData.
- merchantID: the merchantID you get from Google after registration with the Google Pay™ Business Console.
- merchantName: the name that is rendered in the payment window. This is mandatory if you are based in the European Economic Area (EEA) to meet the Strong Customer Authentication (SCA) requirements. Encode the merchantName as UTF-8 according to Google's specifications.
- gateway: use the value returned in the product-response (see code snippets below).
- gatewayMerchantId: your merchantID (PSPID) on our platform.
3. Comply with Strong Customer Authentication (SCA)
If your acquirer is from the European Economic Area (EEA), you must submit the acquiring bank’s country/region information to Google in TransactionInfo.countryCode. This will ensure you comply with SCA requirements. Google Pay™ will return corresponding transaction data based on the country/region of your acquirer.
Find more information on Strong Customer Authentication compliance for Google Pay™ at the Google Pay™ API documentation and in our dedicated guide.
To make sure the transaction is process according to the SCA guideline, populate these fields in the final Create Payment request made from the Server SDK to cover your customer's device.
customer.device.acceptHeader
customer.device.browserData.colorDepth
customer.device.browserData.javaEnabled
customer.device.browserData.screenHeight
customer.device.browserData.screenWidth
customer.device.ipAddress
customer.device.locale
customer.device.timezoneOffsetUtcMinutes
customer.device.userAgent
Find more information about these fields in our complete 3-D Secure properties overview.
4. Render Google Pay™ button
If Google Pay™ is available, add the Google Pay™ button on your checkout page. Make sure to follow Google’s guidelines on displaying the Google Pay™ button and Google's brand policy.
Use the following code sample to add it:
const baseRequest = {"apiVersion": 2,"apiVersionMinor": 0,"allowedPaymentMethods": [{"type": "CARD","parameters": {"allowedAuthMethods": ["PAN_ONLY", "CRYPTOGRAM_3DS"],// googlePay object retrieved in step 1."allowedCardNetworks": googlePayProduct.paymentProduct320SpecificData.networks}}]}// Note that you must import the https://pay.google.com/gp/p/js/pay.js script into your page.// For the PaymentsClient object, please refer to https://developers.google.com/pay/api/web/reference/clientconst paymentsClient = new google.payments.api.PaymentsClient({environment: 'PRODUCTION'});paymentsClient.isReadyToPay(baseRequest).then((response) => {if (response.result) {// button can be renderedconst button = paymentsClient.createButton({// add button click handled. Check step 5 for the handler code.onClick: () => onGooglePayButtonClicked()});// render the button into your checkout page.document.getElementById('googlePayContainer').appendChild(button);}}).catch((err) => {// Google Pay™ is not available, offer your customer another payment option to complete the payment});
5. Initialise the payment
Respond to the customer using the Google Pay™ button by creating a Google Pay™ payment session for the payment:
const onGooglePayButtonClicked = () => {
    // note that some parts of this request are the same as for the one for the button initialisation in step 4,
    // so you might want to reuse it.
    const paymentDataRequest = {
        "apiVersion": 2,
        "apiVersionMinor": 0,
        "allowedPaymentMethods": [{
            "type": "CARD",
            "parameters": {
                "allowedAuthMethods": ["PAN_ONLY", "CRYPTOGRAM_3DS"],
                // googlePayProduct is the payment product object retrieved in step 1.
                "allowedCardNetworks": googlePayProduct.paymentProduct320SpecificData.networks
            },
            "tokenizationSpecification": {
                "type": "PAYMENT_GATEWAY",
                "parameters": {
                    "gateway": googlePayProduct.paymentProduct320SpecificData.gateway,
                    "gatewayMerchantId": "" // check step 2 for this value
                }
            }
        }],
        "merchantInfo": {
            // your Google merchant info. Check step 2 for these values.
            "merchantId": "",
            "merchantName": ""
        },
        "transactionInfo": {
            "totalPriceStatus": "FINAL",
            "totalPrice": "10.00", // enter the correct price
            "currencyCode": "AUD"  // enter the correct currency code
        }
    }

    // The paymentsClient object is created in step 3.
    // This will open the modal popup for the actual payment.
    paymentsClient.loadPaymentData(paymentDataRequest).then((paymentData) => {
        // handle the response. Check the next step for the code.
        processPayment(paymentData);
    }).catch((err) => {
        // show error in the developer console for debugging
        console.error(err);
    });
6. Get the payment token
To process the actual payment, you need to request the payment token from Google. To do so, use the following code snippet:
const processPayment = (paymentData) => {const paymentToken = paymentData.paymentMethodData.tokenizationData.token;// check step 7 for information on how to use this token}
7. Send the payment token
In the Create payment API call, you can provide payment tokens in two different ways:
- You can process the received raw payment token from the previous step. Here is the snippet of the Create Payment request object:
{// ..."mobilePaymentMethodSpecificInput":{"encryptedPaymentData": paymentToken,"paymentProductId":"320"}// ...} - Use the Client SDK to encrypt the token and send it as a payment value in the encryptedCustomerInput of the Create Payment request. This input is an encrypted list of key-value pairs, usually containing user input, which is compiled based on the actual input field. The customer's encrypted payment details:
- are encrypted again
- sent to your server
- used in the server SDK to create a payment
Here is the code that explains how to encrypt it using the Client SDK:
const processPayment = (paymentData) => {const paymentToken = paymentData.paymentMethodData.tokenizationData.token;const paymentRequest = new PaymentRequest();paymentRequest.setPaymentProduct(paymentProduct);paymentRequest.setValue('encryptedPaymentData', paymentToken);if (paymentRequest.isValid()) {session.getEncryptor().encrypt(paymentRequest).then((encryptedString) => {// Send the encrypted payment info to your server and use it as the encryptedCustomerInput value.}).catch((errors) => {// There was an error encrypting the payment input.document.getElementById('error').innerHTML = 'Errors: ' + JSON.stringify(errors);});}}When sent to your server, use it to construct the Create Payment request object:
{// ..."encryptedCustomerInput": encryptedString,// ...}Find detailed information about this object and its properties in our CreatePaymentAPI.
Make sure to determine the device your customers are using for the payment, as it determines whether you have to roll out 3-D Secure manually.
- Your customers use a desktop/tablet: Handle these kind of transactions like ordinary credit card transactions. Hence, you need to include 3-D Secure properties in your request. Have a look at the code samples for to learn how it works:
Request with 3-D Secure properties using encryptedPaymentData
Request with 3-D Secure properties using encryptedCustomerInput - Your customers use a mobile device. The cards used for these kind of transactions are virtual cards linked to a device-specific account number (DPAN). A digital signature protects these card from fraudulent use, making 3-D Secure unnecessary. Have a look at the code samples for:
Request without 3-D Secure properties using encryptedPaymentData
Request without 3-D Secure properties using encryptedCustomerInput
A typical request looks like this:
Request with 3-D Secure properties using encryptedPaymentData
{
  "mobilePaymentMethodSpecificInput":{
    "paymentProductId":"320",
    "requiresApproval":true,
    "encryptedPaymentData":"{\"signature\":\"MEUCIG/WtsJnBf6yLsvnD2LOGaVMCO8E93QizIE0foMscVujAi...\"}",
    "paymentProduct320SpecificInput":{
      "threeDSecure":{
        "challengeIndicator":"no-preference",
        "challengeCanvasSize":"600x400",
        "skipAuthentication":false,
        "redirectionData":{
          "returnUrl":"https://hostname.myownwebsite.url",
          "variant":"100"
        }
      }
    },
    "order":{
      "amountOfMoney":{
        "currencyCode":"AUD",
        "amount":2300
      },
      "customer":{
        "billingAddress":{
          "countryCode":"NZ"
        },
        "device":{
          "acceptHeader":"texthtml,application/xhtml+xml,application/xml;q=0.9,/;q=0.8",
          "browserData":{
            "colorDepth":24,
            "javaEnabled":false,
            "screenHeight":"1200",
            "screenWidth":"1920"
          },
          "ipAddress":"123.123.123.123",
          "locale":"en-US",
          "userAgent":"Mozilla/5.0 (Macintosh; Intel Mac OS X 10_14_4) AppleWebKit/605.1.15 (KHTML, like Gecko) Version/12.1 Safari/605.1.15",
          "timezoneOffsetUtcMinutes":"420"
        },
        "locale":"en_US",
        "merchantCustomerId":"your id of the consumer"
      }
    }
  }
}
Request with 3-D Secure properties using encryptedCustomerInput
{
  "mobilePaymentMethodSpecificInput": {
    "paymentProductId": "320",
    "requiresApproval": true
  },
    "paymentProduct320SpecificInput": {
        "threeDSecure": {
          "challengeIndicator": "no-preference",
          "challengeCanvasSize": "600x400",
          "skipAuthentication": false,
          "redirectionData": {
            "returnUrl": "https://hostname.myownwebsite.url",
            "variant": "100"
        }
    }
  },
  "order": {
    "amountOfMoney": {
      "currencyCode": "AUD",
      "amount": 2300
    },
    "customer": {
      "billingAddress": {
        "countryCode": "NZ"
      },
      "device": {
        "acceptHeader": "texthtml,application/xhtml+xml,application/xml;q=0.9,*/*;q=0.8",
        "browserData": {
          "colorDepth": 24,
          "javaEnabled": false,
          "javaScriptEnabled": true,
          "screenHeight": "800",
          "screenWidth": "360"
        },
        "ipAddress": "123.123.123.123",
        "locale": "en-US",
        "userAgent": "Mozilla/5.0 (Linux; Android 10; SM-G980F) AppleWebKit/537.36 (KHTML, like Gecko) Chrome/87.0.4280.101 Mobile Safari/537.36",
        "timezoneOffsetUtcMinutes": "420"
      },
      "locale": "en_US",
      "merchantCustomerId": "your id="" of="" the="" consumer="""
    },
    "encryptedCustomerInput" : "encrypted string="""
  }
}
Request without 3-D Secure properties using encryptedpaymentdata
{
    "order" : {
        "amountOfMoney" : {
            "currencyCode" : "AUD",
            "amount" : 2300
        },
        "customer" : {
           "merchantCustomerId": "",
           "billingAddress" : {
                "countryCode" : "NZ"
            }
        }
    },
    "mobilePaymentMethodSpecificInput" : {
        "paymentProductId" : 320,
        "encryptedPaymentData": "{\"signature\":\"MEUCIQCcSASjWu3ax9jQ8qX/+rsNLZ95uiyxamXiKnHlJi8A1QIgZj ..."
    }
}
Request without 3-D Secure properties using encryptedcustomerinput
{
    "order" : {
        "amountOfMoney" : {
            "currencyCode" : "AUD",
            "amount" : 2300
        },
        "customer" : {
           "merchantCustomerId": "your id="" of="" the="" consumer=""",
           "billingAddress" : {
                "countryCode" : "NZ"
            }
        }
    },
    "encryptedCustomerInput" : "encrypted string"
}
Google Pay™ in app
We also provide Google Pay™ for native Android or iOS applications. Our client SDKs (Android, Swift, Flutter, React Native) help you embed Google Pay™ into your application, while we will decrypt sensitive payment information for you. The following explanation will use the Android SDK as an example, but other SDKs have the same flow.
Once you have followed Google’s setup guidelines, you are ready to begin the technical integration with us. Google offers a very clear and concise tutorial on how to implement Google Pay™ on your website. The technical integration includes the following steps:
- Retrieve Google Pay™
- Comply with Strong Customer Authentication (SCA)
- Render Google Pay™ button
- Get payment token
- Send payment token
Because you use us to decrypt sensitive payment information, Google uses the following type of tokenization: PAYMENT_GATEWAY.
1. Retrieve Google Pay™
Google Pay™ might not always be available on all devices. The Android SDK client allows you to easily hide Google Pay™ if this is the case. Our platform will then return null. Use the following code sample to make this call:
// The paymentContext is an instance of the PaymentContext class holing the order payment data, such as amount and currencyval googlePayProduct = session.getPaymentProduct(320, paymentContext)if (googlePayProduct != null) {// Google Pay™ is available, render the Google Pay™ button.} else {// Google Pay™ is NOT available.}
2. Comply with Strong Customer Authentication (SCA)
If your acquirer is from the European Economic Area (EEA), you must submit the acquiring bank’s country/region information to Google in TransactionInfo.countryCode. This will ensure you comply with SCA requirements. Google Pay™ will return corresponding transaction data based on the country/region of your acquirer.
The payment product API call from the Client SDK or the Server-to-Server returns the acquirerCountry, which you must send to Google.
private JSONObject getGooglePayPaymentRequestData(PaymentContext paymentContext, PaymentProduct googlePayProduct) {val googlePayData = googlePayProduct.paymentProduct320SpecificDataval cardPaymentMethod = JSONObject().apply {put("type", "CARD")put("parameters", JSONObject().apply {put("allowedAuthMethods", JSONArray(listOf("PAN_ONLY", "CRYPTOGRAM_3DS")))put("allowedCardNetworks", JSONArray(googlePayData.networks))put("billingAddressRequired", false)})put("tokenizationSpecification", JSONObject().apply {put("type", "PAYMENT_GATEWAY")put("parameters", JSONObject().apply {put("gateway", googlePayData.gateway)put("gatewayMerchantId", merchantId)})})}
val transactionInfo = JSONObject().apply {
put("totalPrice", price.toString())
put("totalPriceStatus", "FINAL")
put("currencyCode", currencyCode)
// use the acquirer country code or the country code from your current context
put("countryCode", "BE")
}val paymentRequest = JSONObject() {put("apiVersion", 2)put("apiVersionMinor", 0)}paymentRequest.put("allowedPaymentMethods", JSONArray().put(cardPaymentMethod))paymentRequest.put("transactionInfo", transactionInfo)paymentRequest.put("merchantInfo", JSONObject().apply {put("merchantId", googleMerchantId)put("merchantName", googleMerchantName)})return paymentRequest;}
Find more information on Strong Customer Authentication compliance for Google Pay™ at the Google Pay™ API documentation and in our dedicated guide.
3. Render Google Pay™ button
When the payment request is prepared, display the Google Pay™ button in your app. Make sure to follow Google’s guidelines on displaying the Google Pay™ button and Google's brand policy.
val walletOptions = Wallet.WalletOptions.Builder()
    .setEnvironment(WalletConstants.ENVIRONMENT_PRODUCTION)
    .build()
val client = Wallet.getPaymentsClient(activity, walletOptions)
val requestData = getGooglePayPaymentRequestData(paymentContext, googlePayProduct)
val isReadyToPayRequest = IsReadyToPayRequest.fromJson(requestData.toString())
// First, determine whether Google Pay™ is ready
val isReadyToPayTask = client.isReadyToPay(isReadyToPayRequest)
isReadyToPayTask.addOnCompleteListener { completedTask ->
    try {
        val isAvailable = completedTask.getResult(ApiException::class.java)
        if (isAvailable) {
             val task = client.loadPaymentData(paymentRequest)
             // note that Google Pay requires an activity flow
             AutoResolveHelper.resolveTask(
                client.loadPaymentData(PaymentDataRequest.fromJson(requestData.toString())),
                requireActivity(),
                GOOGLE_PAY_REQUEST_CODE // Your activity code. Check onActivityResult() method below.
            )
        }
    } catch (_: ApiException) {
        // Google pay is not available
    }
}
4. Get payment token
Once the Google Pay process succeeds, you need to get the payment token. To do so, use the following code snippet:
override fun onActivityResult(requestCode: Int, resultCode: Int, data: Intent?) {when (requestCode) {GOOGLE_PAY_REQUEST_CODE -> {when (resultCode) {Activity.RESULT_OK ->data?.let { intent ->PaymentData.getFromIntent(intent)?.let(::handleGooglePaySuccess)}Activity.RESULT_CANCELED -> {dismiss()}AutoResolveHelper.RESULT_ERROR -> {AutoResolveHelper.getStatusFromIntent(data)?.let { status ->// display the error message}dismiss()}}}}}private fun handleGooglePaySuccess(paymentData: PaymentData) {val paymentDataJSONString = paymentData.toJson()try {// Token will be null if PaymentDataRequest was not constructed using fromJson(String).val unformattedGooglePayToken = JSONObject(paymentDataJSONString).getJSONObject("paymentMethodData").getJSONObject("tokenizationData").getString("token")// Token needs to be formatted when using it to create a payment// with mobilePaymentMethodSpecificInput.encryptedPaymentData// Send this to your server to be processed. Check step 5 for more details.val formattedGooglePayToken = JSONObject.quote(unformattedGooglePayToken)} catch (exception: JSONException) {// display the error message}}
5. Send payment token
In the Create payment API call, you can provide payment tokens in two different ways:
- You can process the received raw payment token from the previous step. Here is the snippet of the Create Payment request object:
{// ..."mobilePaymentMethodSpecificInput":{"encryptedPaymentData": formattedGooglePayToken,"paymentProductId":"320"}// ...} - Use the Client SDK to encrypt the token and send it as a payment value in the encryptedCustomerInput of the Create Payment request. This input is an encrypted list of key-value pairs, usually containing user input, which is compiled based on the actual input field. The customer's encrypted payment details:
- are encrypted again
- sent to your server
- used in the Server SDK to create a payment
Here is the code that explains how to encrypt it using the Android SDK and the previously explained code:
val paymentRequest = PaymentRequest()paymentRequest.paymentProduct = googlePayProductpaymentRequest.setValue("encryptedPaymentData", formattedGooglePayToken)val encryptedString = session.preparePaymentRequest(paymentRequest)When sent to your server, use it to construct the Create Payment request object:
{// ..."encryptedCustomerInput": encryptedString,// ...}Find detailed information about this object and its properties in our CreatePaymentAPI.
Process flows
- Your customers finalse an order in your shop / in your app and select Google Pay™.
- Your server sends a specific Google API call to display a list of supported payment methods in the browser / app.
- Your customers select a payment method.
- Your server requests a payment token from Google.
- You send this CreatePayment request to our platform, containing the payment token in property mobilePaymentMethodSpecificInput.encryptedPaymentData
5'(Optional for payments going through your own checkout page). If your customers use a Non-network tokenised card, you redirect the customers to their issuing bank for 3-D Secure authentication.
5''(Optional for payments going through your own checkout page). Your customers perform the 3-D Secure check. Our system receives the result from the issuer. Based on the result, two scenarios are possible:
a) If the identification was successful, the flow continues at step 6.
b) If the identification was unsuccessful, we redirect your customers to your returnUrl, ending the flow. You can request the transaction result as described in step 8. - Google Pay™ processes the actual financial transaction. We receive the transaction result.
- We redirect your customer to your app / returnUrl
- You request the transaction result from our platform via GetPaymentDetails or receive the result via webhooks.
- If the transaction was successful, you can deliver the goods / services.
Testing
Refer to our Test cases for test data and detailed instructions.
- Make sure to use the right endpoint and switch back to the live URL as soon as you have finished your tests.
- The data in our Test cases ONLY work for payment requests in our test environment. Using this data in our production environment will lead to undesirable testing results.
Additional information
Google Pay and Card On File
Card On File (COF) allows a customer's card details to be stored for future payments, which is also possible for Google Pay.
The COF framework defines the fair use of stored card data, giving you specific instructions. We explain these in the dedicated use cases section and provide for each JSON samples/API endpoints. Google Pay only supports use case A and E and as differences apply, we document them here directly.
For recurring or subsequent transactions outside the wallet flow, our platform will process the transaction as a card payment. Even if the initial transaction has been initiated from a wallet, the Merchant Portal and the ANZ Worldline Payment Solutions API will register the transaction as a card payment.
Sample A - CIT first & recurring
| CreateHostedCheckout | CreatePayment |
|---|---|
|
|
Sample E - MIT scheduled payments
{
  "subsequentCardPaymentMethodSpecificInput": {
    "subsequentType": "recurring"
  },
  "order": {
    "amountOfMoney": {
      "amount": 100,
      "currencyCode": "AUD"
    }
  }
}